

I decided to do this write up after finding little help from the intrawebs on exactly how to replace your SWPS on your CTS-V. The symptoms for this sensor going bad on the V are this: The DIC will suddenly and seemingly unexpectedly flash "Stability Control Engaged", this message will go off in a few seconds. In addition you may experience the ABS kicking in with the warning as well. Also after a few instances of the "Stability Control Engaged" warning, the solid "Service Stability System" light will come on and only go off after you press "OK". It should be noted this is what my car was doing and others have experienced different degrees of these warnings. (Mine was severe, coming on quite often).
Another note is that other members have reported these same symptoms as being the YAW sensor which is located under the console. This seemed to be the rarity rather than the norm (SWPS). And it turned out mine was the SWPS so without further explanation of the symptoms here is the fix!
When you decide to undertake this project get the sensor (mine was $88 from the local caddy dealer) and plan to work on the car the following day.
Remove the (-) terminal from the battery the night prior. This will ensure the following morning no juice is left in the system to mess with the air bags :helpless: I also pulled the air bag fuse from under the rear seat to be extra sure!
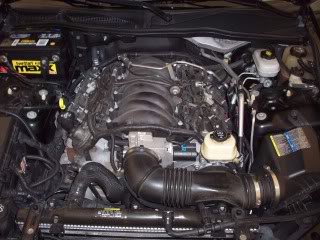
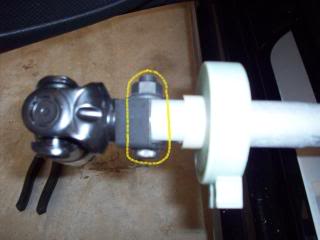
Remove the engine cover (it just snaps on) and the strut bar (4 18mm bolts)
![Image]()
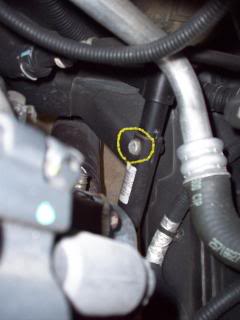
Then locate the steering shaft and rotate the steering wheel so that the bolt holding the lower portion from the upper portion is on top, remove the bolt then straighten out the wheel again. (12 or 13mm bolt)
![Image]()
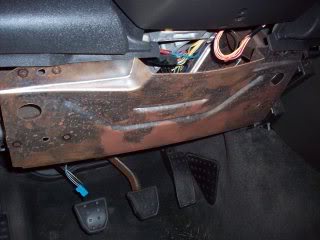
From here go inside the car and remove the knee bolster and lower plastic piece that holds the vanity light. (4 Phillips screws and clips on the knee bolster).
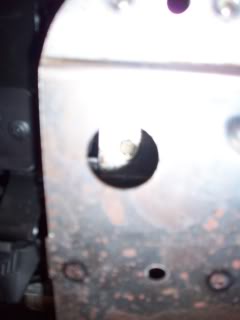
Remove the metal shield that is now exposed. (2 10mm bolts accessed through the holes cut in the metal shield).
![Image]()
![Image]()
![Image]()
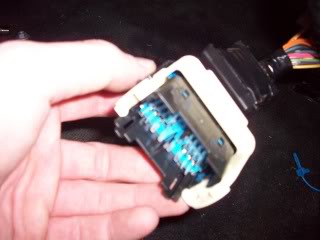
Unplug the giant harness connector.
![Image]()
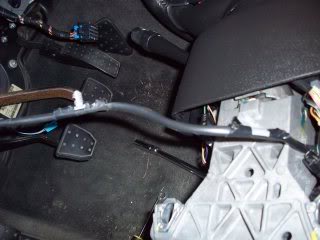
Don't worry about this black wire it will have enough slack to work with.
![Image]()
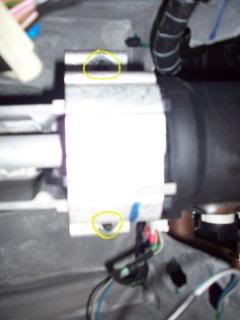
Remove the four bolts that hold the steering column in place. (all 13mm) The pics are kinds tough to see on the top ones but it will be painfully obvious once you get in there!
Bottom bolts.
![Image]()
Top Bolts.
![Image]()
![Image]()
WARNING! Before you proceed ensure the steering wheel does not rotate when pulled out until you get it re-attached to the lower portion in the engine bay. Failure to do so may cause damage to your airbag coil! (Don't worry it will move a bit just don't get complacent and not realize it has turned a bunch on you)!
At this point the column should be hanging loose.
![Image]()
You should be able to pull it out through the firewall, do so and rest the column as pictured. (You may want to rest it on a rag here as I scratched my plastic up a bit).
![Image]()
Remove the little plastic clipped pictured and slide the old position sensor forward.
![Image]()
You will have to remove this bolt to fully slide off the old SWPS.
![Image]()
Then slide on your new sensor and put everything back together. Be sure NOT to pull the pin out of the new sensor until the column is back in so that the internals of the sensor don't rotate on you. (I found you have to pull the pin before pushing the column back through the firewall fully or the black dust boot will block you from doing so after).
Also before you start to try and get the column to line up with the piece in the engine bay pull out on the very bottom HARD with a set of plyers so that when you are pushing the column back into the lower piece in the bay it does not just slide at the fitting. (it will make sense when you try it once and it just collapses on you)! haha
This whole process took me just 3 hours and that was with my S.O. helping out. I'm sure a mechanically inclined friend could bump off at least half an hour with a 6 pack provided of course!
G/L and if anyone has any questions just PM me.... G/L guys!
Another note is that other members have reported these same symptoms as being the YAW sensor which is located under the console. This seemed to be the rarity rather than the norm (SWPS). And it turned out mine was the SWPS so without further explanation of the symptoms here is the fix!
When you decide to undertake this project get the sensor (mine was $88 from the local caddy dealer) and plan to work on the car the following day.
Remove the (-) terminal from the battery the night prior. This will ensure the following morning no juice is left in the system to mess with the air bags :helpless: I also pulled the air bag fuse from under the rear seat to be extra sure!
Remove the engine cover (it just snaps on) and the strut bar (4 18mm bolts)
Then locate the steering shaft and rotate the steering wheel so that the bolt holding the lower portion from the upper portion is on top, remove the bolt then straighten out the wheel again. (12 or 13mm bolt)
From here go inside the car and remove the knee bolster and lower plastic piece that holds the vanity light. (4 Phillips screws and clips on the knee bolster).
Remove the metal shield that is now exposed. (2 10mm bolts accessed through the holes cut in the metal shield).

Unplug the giant harness connector.
Don't worry about this black wire it will have enough slack to work with.
Remove the four bolts that hold the steering column in place. (all 13mm) The pics are kinds tough to see on the top ones but it will be painfully obvious once you get in there!
Bottom bolts.
Top Bolts.


WARNING! Before you proceed ensure the steering wheel does not rotate when pulled out until you get it re-attached to the lower portion in the engine bay. Failure to do so may cause damage to your airbag coil! (Don't worry it will move a bit just don't get complacent and not realize it has turned a bunch on you)!
At this point the column should be hanging loose.

You should be able to pull it out through the firewall, do so and rest the column as pictured. (You may want to rest it on a rag here as I scratched my plastic up a bit).
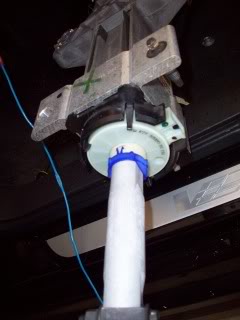
Remove the little plastic clipped pictured and slide the old position sensor forward.

You will have to remove this bolt to fully slide off the old SWPS.
Then slide on your new sensor and put everything back together. Be sure NOT to pull the pin out of the new sensor until the column is back in so that the internals of the sensor don't rotate on you. (I found you have to pull the pin before pushing the column back through the firewall fully or the black dust boot will block you from doing so after).
Also before you start to try and get the column to line up with the piece in the engine bay pull out on the very bottom HARD with a set of plyers so that when you are pushing the column back into the lower piece in the bay it does not just slide at the fitting. (it will make sense when you try it once and it just collapses on you)! haha
This whole process took me just 3 hours and that was with my S.O. helping out. I'm sure a mechanically inclined friend could bump off at least half an hour with a 6 pack provided of course!
G/L and if anyone has any questions just PM me.... G/L guys!


