

A common problem for Cadillacs, and many other cars at that, is their reputation for getting a dirty throttle body due to carbon buildup. Dirty throttle bodies would eventually produce what many people would refer to as a "sticky gas pedal" and frequent stalls at stops. The simple fix for this common problem is one that can be done by anyone with the proper tools.
By now you may be wondering, what is the throttle body? In simple terms, the throttle body is a round opening that controls airflow. For a further explanation on how this works, read the article in the yellow box on this page: http://www.popularmechanics.com/automotive/sub_care_sat/1272341.html?page=3&c=y
Now, down to the nitty gritty...how can I clean the throttle body? Cleaning the throttle body is a simple process that this walkthrough will demonstrate. Let's start.
Tools Needed:
Ratchet with 9/32" bit.
Carb Cleaner (Top Gum Brand is used in this walkthrough)
Rag or Toothbrush (to clean)
Step 1: Remove the Air Intake. This can be done by simply pulling it off at the round opening at the top.
There is one sensor that may have to be unplugged (it should have red lining). In this walkthrough, there are a total of 3.
![Image]()
Specifically, this is the air intake:
![Image]()
Step 2; part 1: The removal of the air intake will expose the MAF screen.
![Image]()
Specifically, this is the MAF screen:
![Image]()
Step 2; part 2: Remove the MAF screen with a ratchet. (You will need a 9/32" bit)
The red outlines indicate where you should remove the screws. The blue outlines indicate sensors plugs that can/may be removed for easier access as previously mentioned. There are 3 screws, one is under the MAF screen, remove this one first to make things easier (it is the hardest to loosen because of its location).
![Image]()
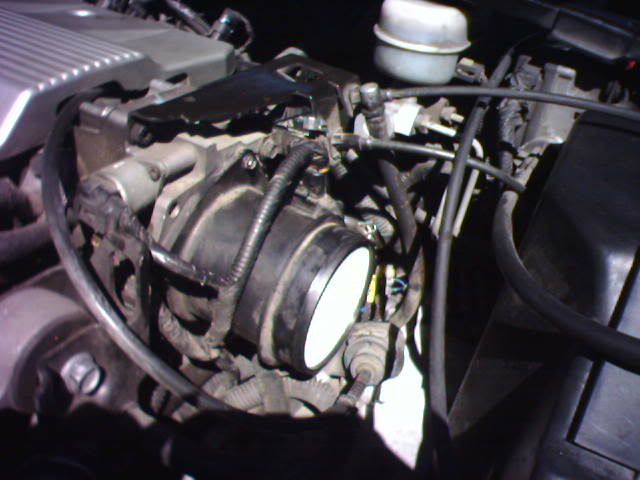
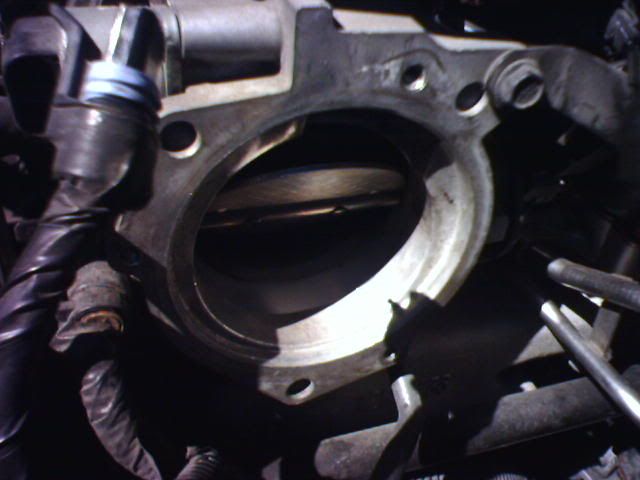
Step 3: The throttle body and throttle body blade ("blade" does not indicate that it is sharp) are now exposed.
The throttle body blade opens when the accelerator is pressed. It will need to be kept open in order for proper cleaning. In order to do this, you may lay something heavy on the accelerator (manually keeping it open will tire your hands).
![Image]()
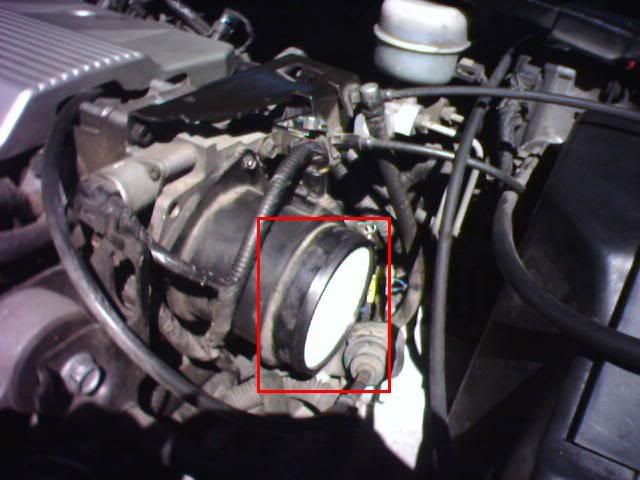
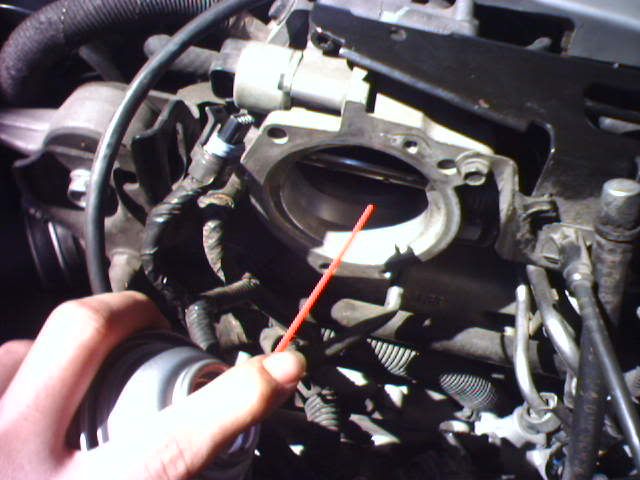
Step 4: Proceed to clean the throttle body with Carb Cleaner.
You may either spray some on the actual blade and bore, or spray on a toothbrush and clean. DO NOT FORGET to clean the blade perimeter as well.
![Image]()
After you are done cleaning the throttle body, reassemble everything by following these steps backwards. REMEMBER TO RE-CONNECT ALL UNPLUGGED SENSORS.
The total amount of time required for this task depends on how well you are aware with the location of certain objects. It may range from 30 minutes to 2 hours including cleaning.
-SL1CK
By now you may be wondering, what is the throttle body? In simple terms, the throttle body is a round opening that controls airflow. For a further explanation on how this works, read the article in the yellow box on this page: http://www.popularmechanics.com/automotive/sub_care_sat/1272341.html?page=3&c=y
Now, down to the nitty gritty...how can I clean the throttle body? Cleaning the throttle body is a simple process that this walkthrough will demonstrate. Let's start.
Tools Needed:
Ratchet with 9/32" bit.
Carb Cleaner (Top Gum Brand is used in this walkthrough)
Rag or Toothbrush (to clean)
Step 1: Remove the Air Intake. This can be done by simply pulling it off at the round opening at the top.
There is one sensor that may have to be unplugged (it should have red lining). In this walkthrough, there are a total of 3.
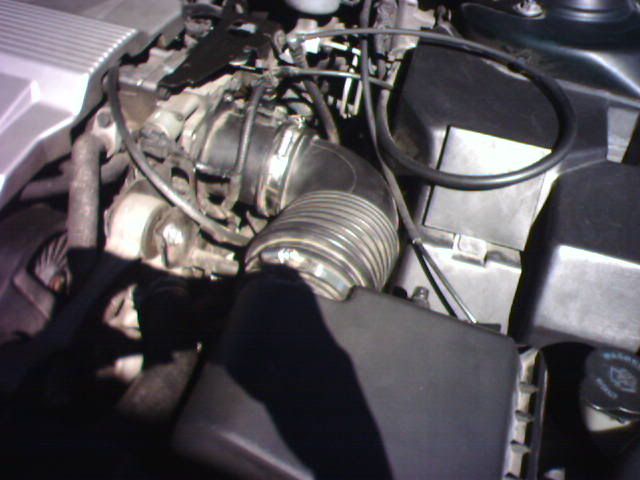
Specifically, this is the air intake:
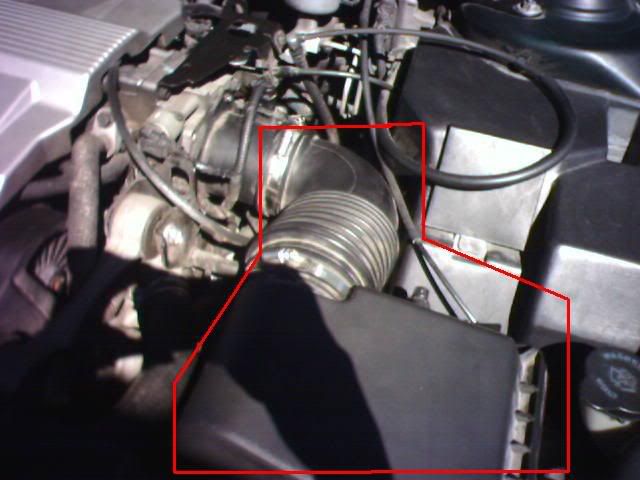
Step 2; part 1: The removal of the air intake will expose the MAF screen.
Specifically, this is the MAF screen:
Step 2; part 2: Remove the MAF screen with a ratchet. (You will need a 9/32" bit)
The red outlines indicate where you should remove the screws. The blue outlines indicate sensors plugs that can/may be removed for easier access as previously mentioned. There are 3 screws, one is under the MAF screen, remove this one first to make things easier (it is the hardest to loosen because of its location).

Step 3: The throttle body and throttle body blade ("blade" does not indicate that it is sharp) are now exposed.
The throttle body blade opens when the accelerator is pressed. It will need to be kept open in order for proper cleaning. In order to do this, you may lay something heavy on the accelerator (manually keeping it open will tire your hands).
Step 4: Proceed to clean the throttle body with Carb Cleaner.
You may either spray some on the actual blade and bore, or spray on a toothbrush and clean. DO NOT FORGET to clean the blade perimeter as well.
After you are done cleaning the throttle body, reassemble everything by following these steps backwards. REMEMBER TO RE-CONNECT ALL UNPLUGGED SENSORS.
The total amount of time required for this task depends on how well you are aware with the location of certain objects. It may range from 30 minutes to 2 hours including cleaning.
-SL1CK


