

This thread will provide instructions on how to uninstall the factory Non-Nav/Radio unit from a Cadillac Escalade 2007-2011 and install the factory SuperNav/GPS/Navigation on a Cadillac Escalade 2007-2011.
I am doing this write up because about a month ago I purchased an 08 Escalade with Non-nav radio and this was the first upgrade/install I wanted to do. Instructions were hard to come by and usually vague. I hope this helps those who are looking to do the same mod. If it is helpful please vote on my poll above.
Keep in mind I have no electrical or audio/video education. Nor have I ever modded any of my previous vehicles. So, in my opinion, this install is more psychologically challenging than anything else. This install took me no more than an hour. The latches all need a significant amount of force to be released so don't be scared to pull hard. I used a plastic 4" putty knife to release panels and it was a critical tool. Make sure you have this tool or similar.
Step 1:
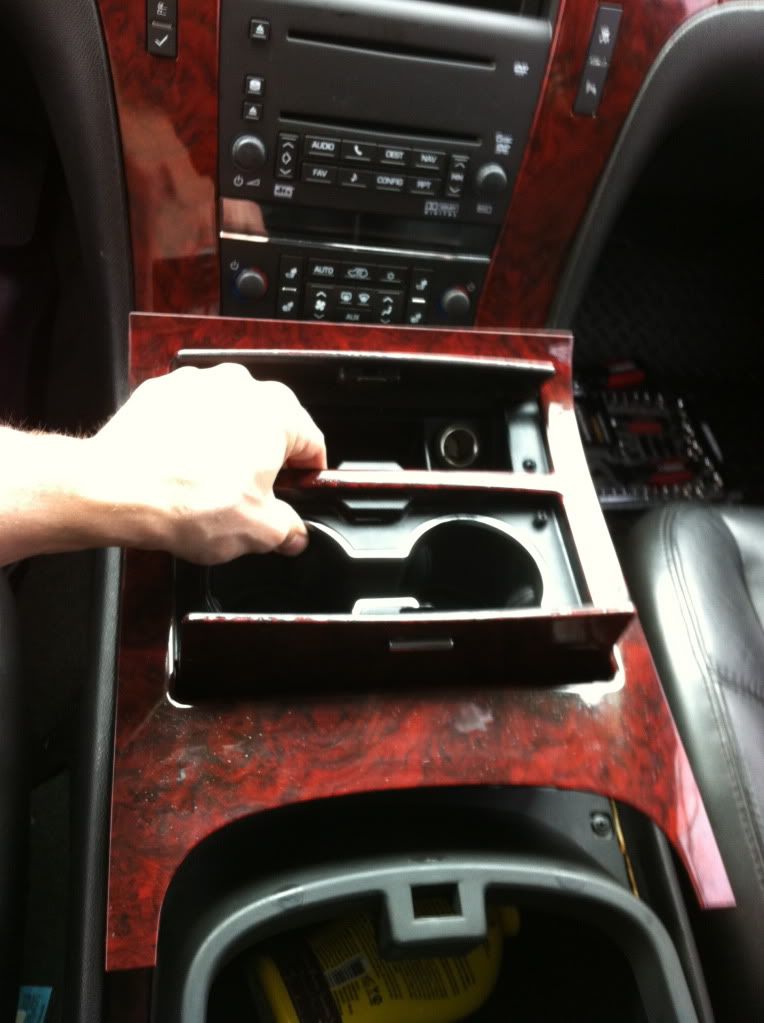
Remove Cup holder/Ash tray bezel. Open both the Ash tray and Cup holder. Grasp with thumbs in cup holder side and fingers in ash tray side. Firmly lift up and back (away from climate controls). There are four main latches that need to be released. Two on either side of the arm rest and two up by the climate controls on either side.
![Image]()
![Image]()
Step 2:
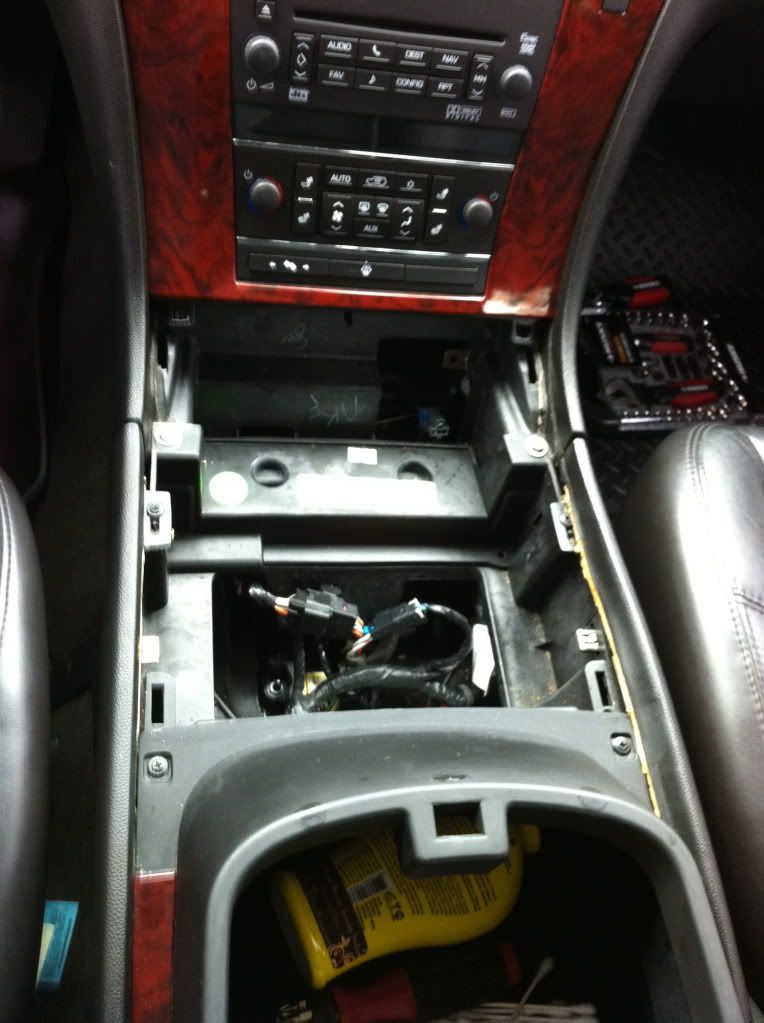
Use a firm flat-bladed plastic tool to pry off the trim plate above the glove box. Insert flat-bladed plastic tool underneath wood grain. Slide tool until you reach a latch. Use fingers to pull panel away and release latch. Continue to slide tool and release each latch until fully removed.
![Image]()
Step 3:
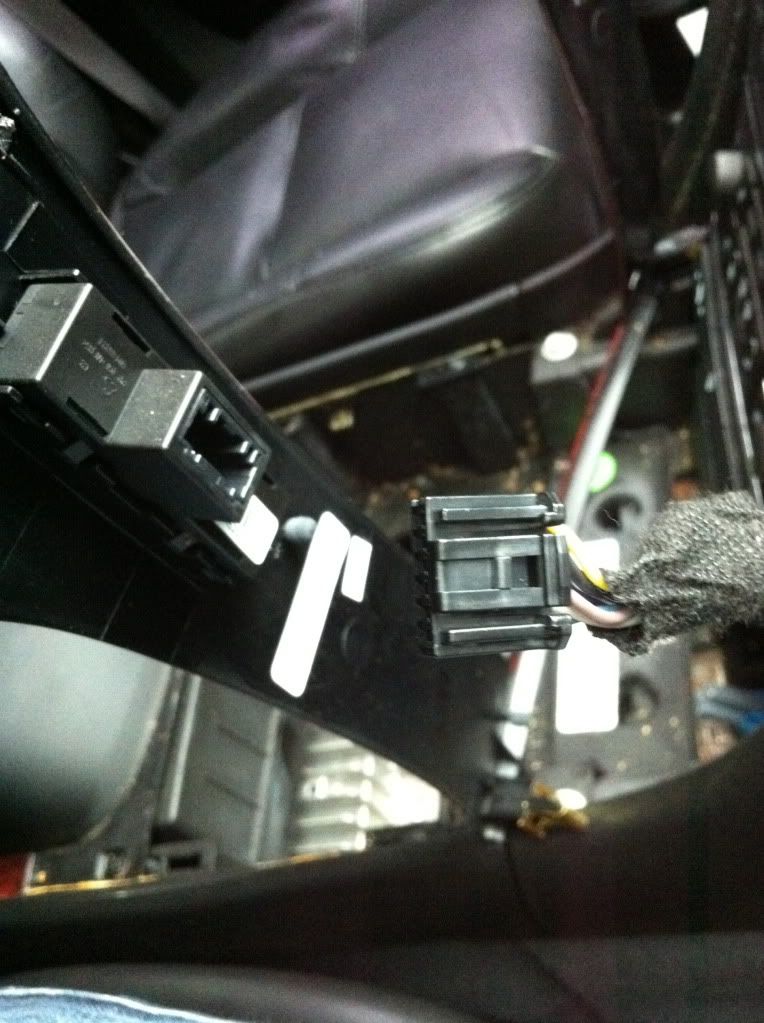
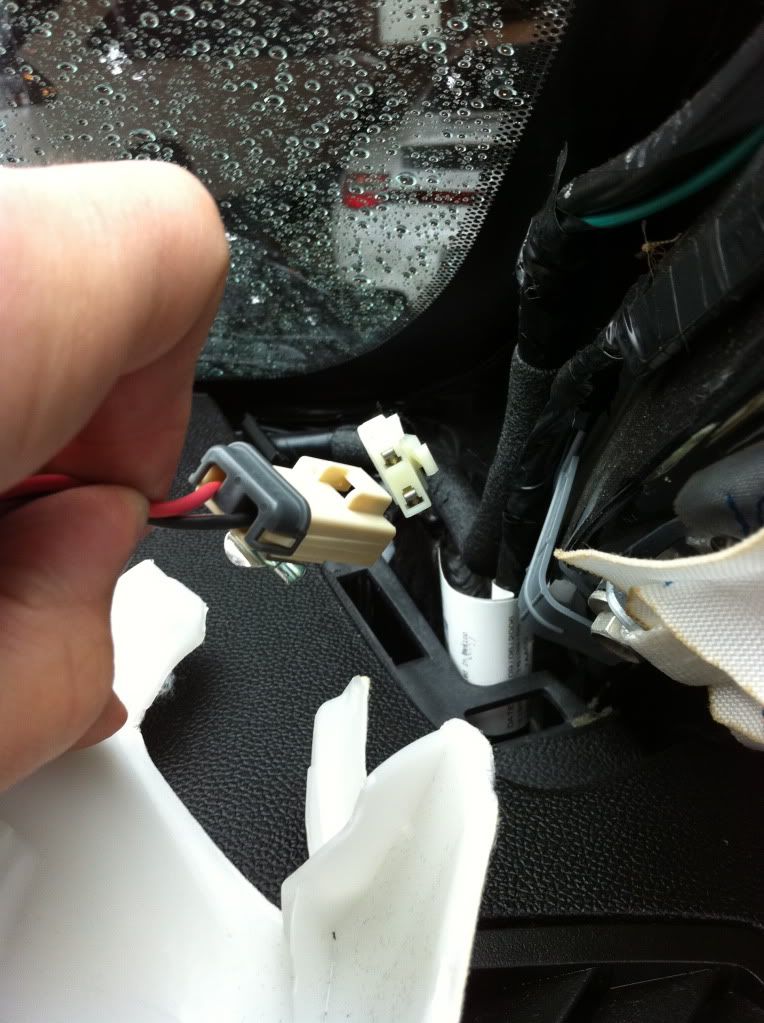
Use the firm flat-bladed plastic tool to pry off the trim plate from around the instrument panel. This is the panel surrounding the radio/climate controls. Start with the top right corner where you have just removed panel above glove box. Slide flat-bladed plastic tool in underneath wood grain and Once all the latches are released you will notice that there are two electrical plugs that need to be disconnected before you completely remove. Simply release the clasps with your fingers and the plugs will disconnect.
![Image]()
Step 4:
Remove passenger side assist handle from pillar. Use a screwdriver or similar to remove the two screw covers. Use a 10mm bit to unscrew nuts. Pull handle away from pillar.
![Image]()
Step 5:
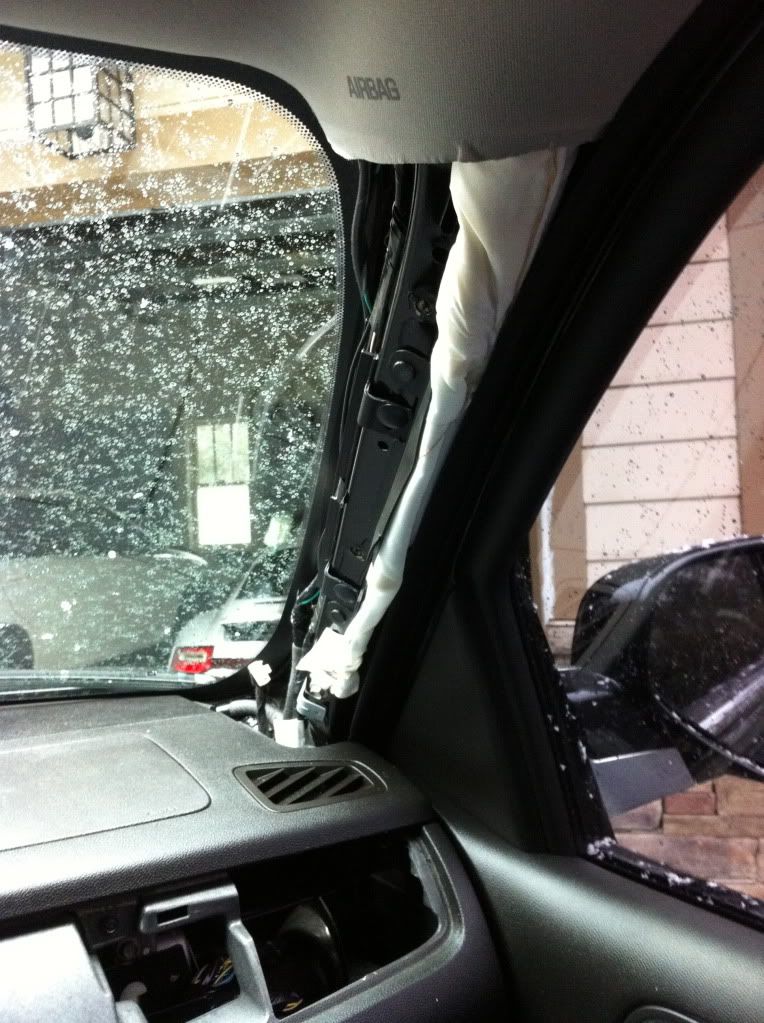
Remove Pillar cover. Use fingers to pry pillar cover away. There are four main latches to release. Two up by the handle and two down by the tweeter. Disconnect tweeter by simply pressing in the latch on the connector.
![Image]()
![Image]()
Step 5:
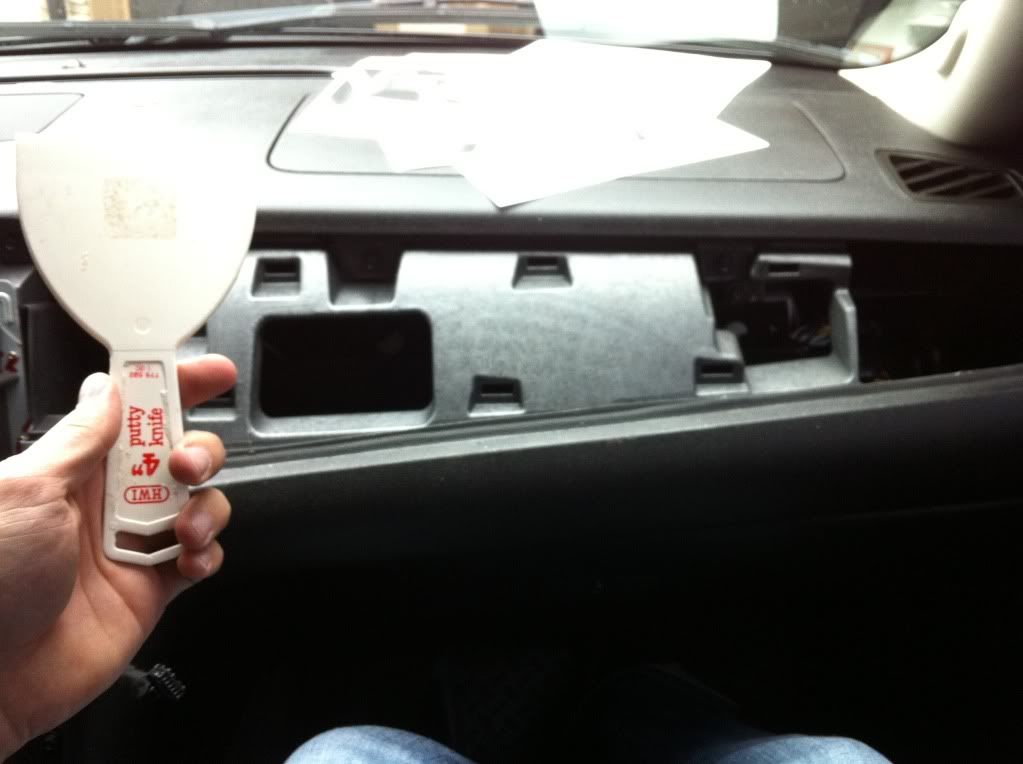
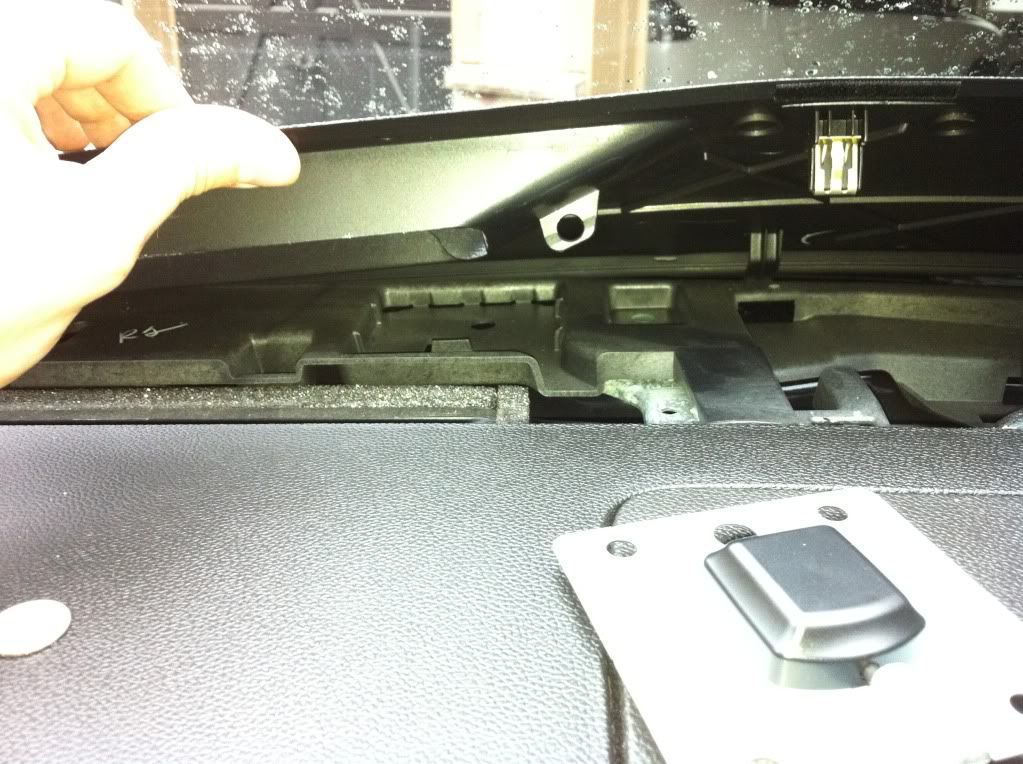
Remove defroster panel at front-most dash. Use the flat-bladed firm plastic tool to pry up the panel. Again, insert the plastic flat-bladed tool under the panel and slide it toward the steering wheel. When the tool hits a latch use your fingers to pull up and release the latch. Continue to slide the tool along until all latches are released. [Note: I did not fully remove this panel. I did so just enough to slide in the GPS antenna. If you do fully remove you must disconnect electrical plug to compass]
![Image]()
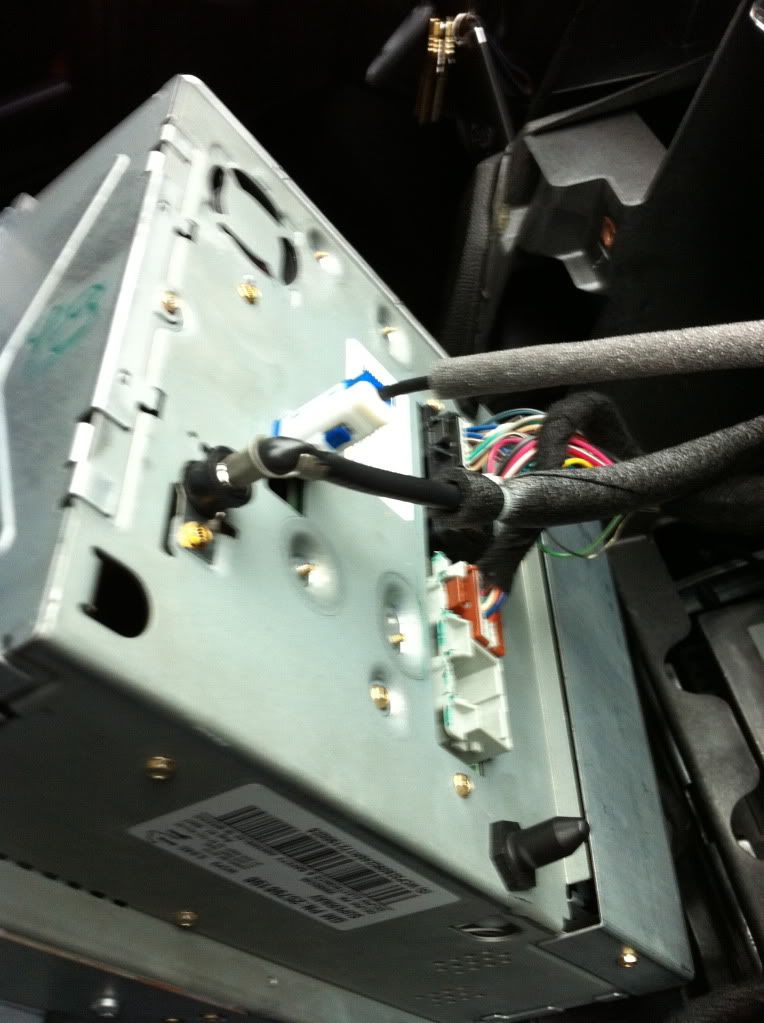
Step 6:
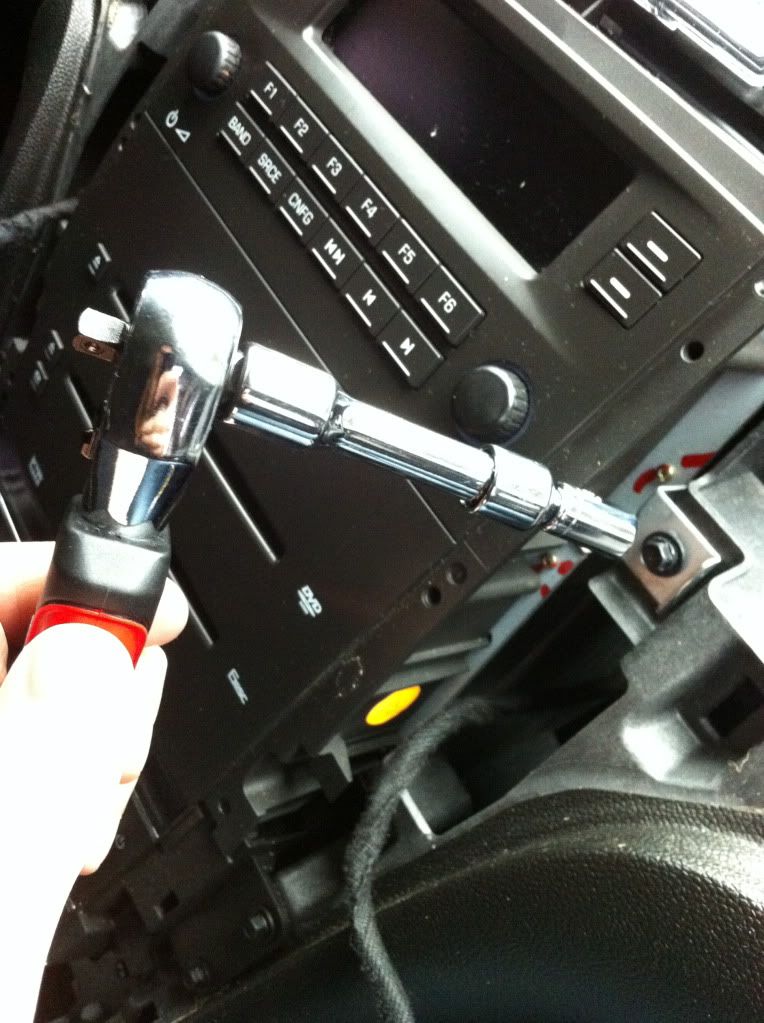
Remove Non-nav radio. Use a 9/32 bit to unscrew nuts from around radio unit. There are six total nuts. When nuts are removed pull unit away from dash. Using fingers, unplug the audio/video cords. Also unplug the black XM/Onstar cord (I am not positive the black cord is for onstar/XM, could someone please confirm what the black cord is for).
![Image]()
![Image]()
Step 7:
Place GPS/Navigation antenna head in the slot provided under defrost panel. Run the cord from GPS/Navigation antenna to the back of the GPS/Navigation unit area. [Note: this is very simple. There are a couple of different ways to run the cord to the back of GPS unit.]
![Image]()
Step 8:
Plug all appropriate cords into back of GPS/Navigation unit. The cords are plugged in exactly like the Non-nav unit. Remember to plug in new GPS/Navigation antenna to appropriate port. If desired, turn vehicle on and watch GPS/Navigation unit start up. [Mine displayed the Cadillac and globe for a few seconds then read "THEFTLOCK ACTIVATED."
![Image]()
![Image]()
Step 9:
Screw GPS/Navigation unit into slot. Using the 9/32 bit screw all six nuts back into appropriate slots just as you removed them.
![Image]()
Step 10:
Reinstall defrost/front dash panel. Snap all appropriate latches back into place just as you removed them.
Step 11:
Reinstall passenger pillar cover just as you removed it. Plug tweeter back in at connector. Snap all appropriate latches back into place.
Step 12:
Reinstall passenger handle back into place just as you removed it. Use 10mm bit to screw nuts back into place. Replace screw covers as you removed them.
Step 13:
Reinstall the trim plate around the instrument panel (The panel surrounding the radio/climate controls). Plug electrical ports back into housing like you had removed them.
Step 14:
Reinstall trim plate above the glove box. Simply snap the trim plate back into appropriate latches.
Step 15:
Reinstall Cup holder/Ash tray bezel. Simply snap the bezel back into place like you had removed it.
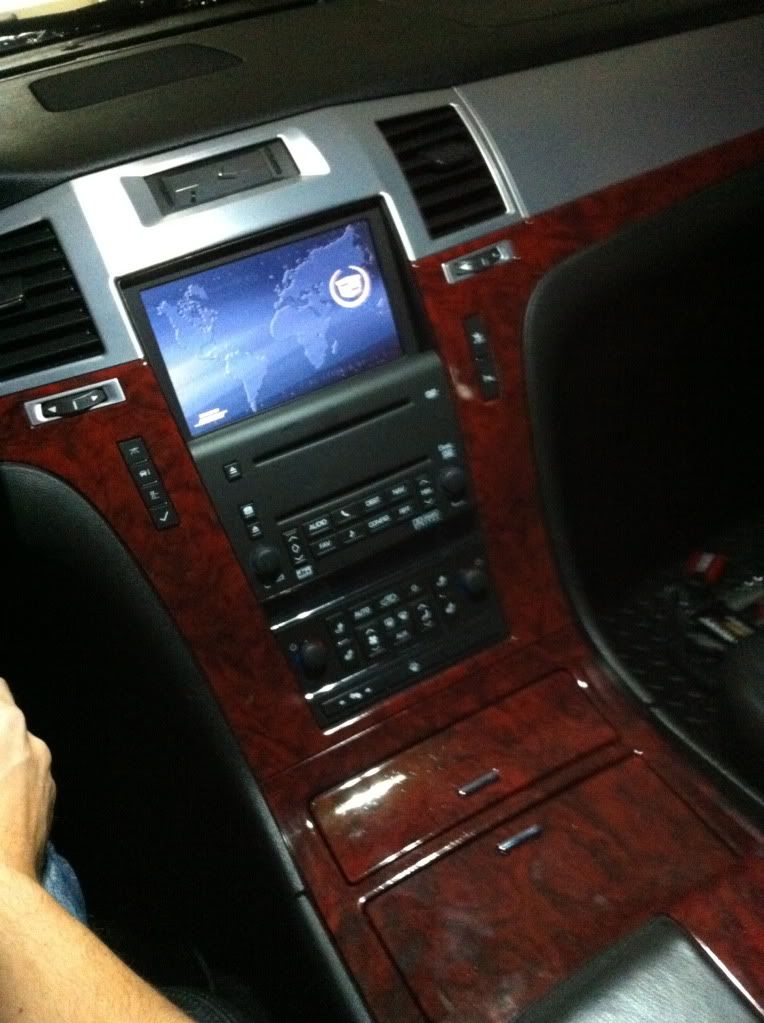
AFTER picture for your reference:
![Image]()
I am doing this write up because about a month ago I purchased an 08 Escalade with Non-nav radio and this was the first upgrade/install I wanted to do. Instructions were hard to come by and usually vague. I hope this helps those who are looking to do the same mod. If it is helpful please vote on my poll above.
Keep in mind I have no electrical or audio/video education. Nor have I ever modded any of my previous vehicles. So, in my opinion, this install is more psychologically challenging than anything else. This install took me no more than an hour. The latches all need a significant amount of force to be released so don't be scared to pull hard. I used a plastic 4" putty knife to release panels and it was a critical tool. Make sure you have this tool or similar.
Step 1:
Remove Cup holder/Ash tray bezel. Open both the Ash tray and Cup holder. Grasp with thumbs in cup holder side and fingers in ash tray side. Firmly lift up and back (away from climate controls). There are four main latches that need to be released. Two on either side of the arm rest and two up by the climate controls on either side.
Step 2:
Use a firm flat-bladed plastic tool to pry off the trim plate above the glove box. Insert flat-bladed plastic tool underneath wood grain. Slide tool until you reach a latch. Use fingers to pull panel away and release latch. Continue to slide tool and release each latch until fully removed.
Step 3:
Use the firm flat-bladed plastic tool to pry off the trim plate from around the instrument panel. This is the panel surrounding the radio/climate controls. Start with the top right corner where you have just removed panel above glove box. Slide flat-bladed plastic tool in underneath wood grain and Once all the latches are released you will notice that there are two electrical plugs that need to be disconnected before you completely remove. Simply release the clasps with your fingers and the plugs will disconnect.
Step 4:
Remove passenger side assist handle from pillar. Use a screwdriver or similar to remove the two screw covers. Use a 10mm bit to unscrew nuts. Pull handle away from pillar.

Step 5:
Remove Pillar cover. Use fingers to pry pillar cover away. There are four main latches to release. Two up by the handle and two down by the tweeter. Disconnect tweeter by simply pressing in the latch on the connector.
Step 5:
Remove defroster panel at front-most dash. Use the flat-bladed firm plastic tool to pry up the panel. Again, insert the plastic flat-bladed tool under the panel and slide it toward the steering wheel. When the tool hits a latch use your fingers to pull up and release the latch. Continue to slide the tool along until all latches are released. [Note: I did not fully remove this panel. I did so just enough to slide in the GPS antenna. If you do fully remove you must disconnect electrical plug to compass]
Step 6:
Remove Non-nav radio. Use a 9/32 bit to unscrew nuts from around radio unit. There are six total nuts. When nuts are removed pull unit away from dash. Using fingers, unplug the audio/video cords. Also unplug the black XM/Onstar cord (I am not positive the black cord is for onstar/XM, could someone please confirm what the black cord is for).
Step 7:
Place GPS/Navigation antenna head in the slot provided under defrost panel. Run the cord from GPS/Navigation antenna to the back of the GPS/Navigation unit area. [Note: this is very simple. There are a couple of different ways to run the cord to the back of GPS unit.]
Step 8:
Plug all appropriate cords into back of GPS/Navigation unit. The cords are plugged in exactly like the Non-nav unit. Remember to plug in new GPS/Navigation antenna to appropriate port. If desired, turn vehicle on and watch GPS/Navigation unit start up. [Mine displayed the Cadillac and globe for a few seconds then read "THEFTLOCK ACTIVATED."

Step 9:
Screw GPS/Navigation unit into slot. Using the 9/32 bit screw all six nuts back into appropriate slots just as you removed them.

Step 10:
Reinstall defrost/front dash panel. Snap all appropriate latches back into place just as you removed them.
Step 11:
Reinstall passenger pillar cover just as you removed it. Plug tweeter back in at connector. Snap all appropriate latches back into place.
Step 12:
Reinstall passenger handle back into place just as you removed it. Use 10mm bit to screw nuts back into place. Replace screw covers as you removed them.
Step 13:
Reinstall the trim plate around the instrument panel (The panel surrounding the radio/climate controls). Plug electrical ports back into housing like you had removed them.
Step 14:
Reinstall trim plate above the glove box. Simply snap the trim plate back into appropriate latches.
Step 15:
Reinstall Cup holder/Ash tray bezel. Simply snap the bezel back into place like you had removed it.
AFTER picture for your reference:
") )
)

